Imagine being able to transform a noisy market visual into a soulful summer afternoon. This magical effect is an excellent example of what good Bokeh photography can help you achieve. Bokeh is a very potent tool that photographers use to build an atmosphere of ‘fantasy’, ‘surreal art’, or even ‘mysticism’, all of which add ‘story’ to your image.

Notice how the solitary dying leaf in the foreground above has been brought into sharp focus by blurring the background. Notice also that the faded portion reveals a fallow field, which hints at a more massive change in season afoot.
Multiple sources of light and reflecting surfaces make for stunningly beautiful Bokeh shots, as seen below. Observe how the diffused lights from overlapping circles make full use of the color palette. Patterns can be seen in the way the orbs spread around, seemingly randomly at first, and then merging into polygonal trails on closer inspection.

The image below uses contrasting light from reflective surfaces to illuminate a dark corner in a bright city. The Bokeh effect, when created intentionally, can turn out to be a powerful weapon in your artistic arsenal.
What is Bokeh Photography
The expression, ‘Bokeh,’ was assimilated into photographic lingo from the Japanese ‘Boke’ – which means blur or haze. Bokeh refers to the optical effect that photographers create when the camera renders an out-of-focus background through the lens. The out-of-focus parts then appear less sharp than the rest of the picture. The resulting contrast helps you to eliminate distractions and direct the viewer’s eyes towards the object of attraction.
A photography or fashion portfolio containing Bokeh shots is a great way to showcase your talent. Portrait photographers, beach photographers, nature photographers, sports photographers, landscape and street photographers have all used Bokeh to immense advantage. Family photographers can use Bokeh to bring out memorable portrait captures. Lifestyle and portfolio shoots can be made more vivid using blur and light combinations.

The picture above subtly blurs the beach behind the subject while retaining the clear outline of water, sand and foliage. This camouflages the less important story with what’s going on in the foreground. Wedded couples would undoubtedly find the unmet kiss and obvious affection endearing. This is the impression that wedding photographers would want to showcase in their client galleries.
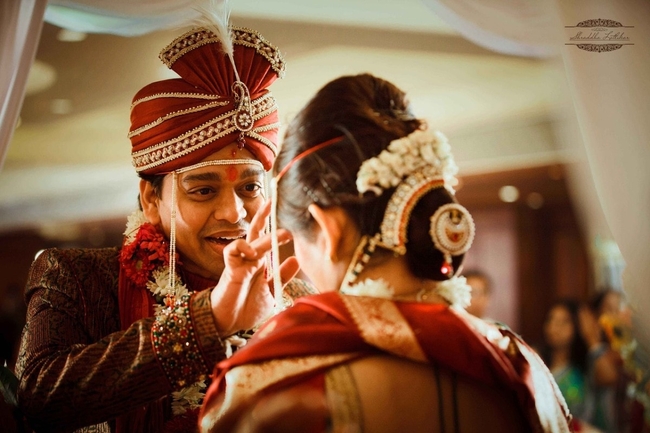
Bokeh photographs are a quintessential part of building portrait, wedding and fashion portfolios. Bokeh photographs are not just stunning, they add an extra edge to your portfolio, making your work stand out and impress clients.
Looking to showcase your bokeh photography skills and build a great photography portfolio website? Get inspired from these awesome examples of photography portfolio websites made on Pixpa.
The reason why Bokeh is so popular among photographers is that despite being so potent, Bokeh principles are amazingly simple to understand. Whether you’re just starting with photography or are a professional photographer looking to add more skillsets to your repertoire, Bokeh photography is very much in demand.
Here is 15 easy tips on How to do Bokeh Photography for beginners.
- Having a Good Camera
- Choose Wide Apertures
- Focal Length
- Lenses to Add Blur
- Shutter Speed
- ISO value
- When to Use AV mode
- Use of Close-Ups
- Use of Blur Effects & More...
Choose Wide Apertures
1. Your Camera Matters:
Choosing which camera works best for Bokeh photography is a debate for brands to slug out. However, there are certain things that you should know before you start to point and shoot.
Smartphones may seem convenient at first. But professional photographers cannot afford to limit their work to fixed focal lengths and restrictive software settings. We recommend that you use either a bridge camera (aka a hybrid camera or a prosumer) or a variable lens system camera. The latter allows you to quickly detach and fix multiple lenses for different moods and effects. You can also add accessories such as flashguns to control lighting.

On the other hand, bridge cameras are relatively pro budget and lighter to carry. Which camera you choose depends on your personal goals in photography. For those aspiring to take up photography professionally, owning a system lens is an intelligent aspirational investment.
2. Choose Wide Apertures for Great Bokeh Photography:
An image is captured on camera when light from the object being shot falls upon a photographic film or sensor.
Before reaching the sensor, the rays of light, need to pass through a hole controlled by a set of moving metal blades. The size of this hole, otherwise called the aperture, controls the amount of light that goes in. The higher the aperture size, the more the light that enters the camera and the brighter the image. Aperture sizes are expressed in f-numbers or f-stops. By convention, smaller f-stops indicate larger aperture sizes.

Larger aperture sizes also mean lower Depth-Of-Field (DOF). The Depth-of-Field is the area that remains in sharp focus through the camera’s viewfinder. Because we want our background to be out of focus, we need smaller DOFs. A minimum aperture size of f/2.8 is recommended for capturing great beginner Bokeh shoots.
3. Best Focal Length for Bokeh Photography:
The other important property of lenses that affects its depth-of-field is the Focal Length. The Focal Length is the distance between the point where the light beams from the lens converge and the light sensor. Focal Length is ordinarily expressed in millimeters (mm).
The larger the Focal Length, the narrower is the angle of view, and the smaller is the area in focus. This is one reason why landscape or street photographers use wide angle lenses – to capture as much of the view as possible. Unless the object being photographed is very near, you’ll end up getting very sharp images, without blurs, with these lenses. For Bokeh photography, you would need lenses with Focal Lengths of at least 50 mm. Good 50 mm DSLRs are available that give you apertures of about f/1.4 of f/1.8. Beginners can learn Bokeh quickly with these lens sizes.
4. Use Zoom Lenses or Telephoto Lenses to Add Blur:
Beginners who need to adopt various photography techniques in a short time can buy cameras with variable aperture sizes and focal lengths. Zoom lenses allow you to change between focal lengths and obtain blurs even with distant objects.
Telephoto lenses are often used by sports and wildlife photographers to capture intimacy with the subject. Combining zoom lenses with aperture sizes of f/2.8 and below helps you attain a significantly higher blur.
5. What’s the Best Shutter Speed for Bokeh?
To ensure that your photo does not contain inappropriate dark or bright spots, you need to keep in mind three things – aperture size, shutter speed, and ISO. Because we’ve talked about aperture size before, let us now focus on shutter speed. In simple terms, shutter speed is the amount of time your camera’s digital sensor remains exposed to light.
Lower shutter speeds typically allow you to incorporate blurriness in your image. The exact shutter speed required for your camera to capture good Bokeh pictures will depend on the lens system and the focal length. One right combination for Bokeh photography is a 100 mm film with f/2.8, shutter speed 1/100 seconds, and an ISO of 320. An excellent budget Bokeh spec would read as follows: Film 50 mm, f/1.4, or Film 50 mm, f/1.8.
6. Light Sensitivity and the Best ISO value for Bokeh:
The sensitivity of your camera’s image sensor to light, also denoted by it’s ISO value, does not directly affect the blurriness of your images. However, a higher ISO does lead to more graininess in the picture. Hence, you would ideally like to keep ISO values low for daytime shoots. At night shoots, however, you would require higher ISO values to get ample light exposure to your subject.

Most digital cameras have ISO values ranging from ISO 100 to ISO 6400. Brighter backgrounds often call for low ISO settings. Typically these would fall in the range of ISO 100 to ISO 200. While low light environments, such as an indoor room, would require ISO settings between ISO 800 to ISO 1600 without a flash. At the extreme end of the low-light spectrum, you may need ISO values ranging from ISO 1600 to ISO 3200. Note that this will also increase digital noise. ISO ranges greater than 6400 are suitable for freezing very rapid movement or for capturing distant objects on a jerky handheld camera.
7. Judging when to Use AV mode for Bokeh:
Your digital camera will typically let you fix aperture to ‘wide’ while automating the selection of shutter speed. This feature is popularly known as the Aperture Priority mode or AV mode on your DSLR or mirrorless camera. While this Bokeh setting may seem right for beginners, situations will arise when your camera does not respond fast enough. Sometimes, the logic circuits may misread sensors and get the exposure wrong. Beginners are advised to use caution when using the AV mode. Individual cameras allow you to adjust exposure compensation even in AV mode.
8. Use Close-Ups to Create Bokeh Portraits:

Close-ups with a wide lens give you the best defocused backgrounds. At the same time, you can vary other settings such as ISO and shutter speed to experiment with the quality of exposure. Because contrast is the principal goal of using Bokeh, you can use blurred backgrounds to create some of the best Bokeh portraits of your portfolio.
9. Use blur effects from everyday objects around:
You can use motion blur photography infront or behind the subject to produce a blur in your picture. Fluid and reflective surfaces, such as water or glass, make for excellent range of texture and depth of the blur.
10. Use backgrounds that contain significant ‘visual detail’:
Your background image should reveal sufficient detail to catch your viewer’s interest. This way, you can inject a second mysterious story behind the active subject.

11. Choose a stunning background:
Blurriness in your image delivers the most aesthetic impression when it is controlled. Place your subject at the appropriate distance from the chosen context. Sports and wildlife photographers would need to move themselves to get the right angle. Judging which distance is best depends upon the Focal Length and range of your particular camera. Time and experience are the best teachers in this regard. Develop expansive landscape visuals with mesmerizing blur photography.
12. Best Aperture Plates for Bokeh:
Bokeh photography captures can be used to dull background sources of light. However, suitably soft, creamy backgrounds appear best when there are at least nine interlocking aperture plates. These plates ought to be circular to get the best creamy Bokeh backgrounds. Other shapes will give your background lights a polygonal shape. Polygonal orbs look cluttered and do not lend themselves well to the symmetry of the photo.
13. Quality of Lenses for Bokeh:
The quality of your lens matters because soft material tends to get deformed faster. You then get images that are mushy at the corners, and occasionally, at all other places.
14. Make your own Bokeh filters for Mystical Images:
You can create your own Bokeh stencils to give desired shapes to background light sources. Just paste the cut-out stencil on top of your lens and shoot. Be careful in using precise measurements. The neater your shapes are, the more professional your work, and the larger the impression that it will make on your audience. You can create beautiful Bokeh shimmer by shooting from behind a glass, a window or plastic.

Using glass in between the subject and you also lets you add bokeh to the foreground. Reflections off the glass have added more light to the image above.
15. Use Distance to Control the degree of blur:
Notice how the Bokeh blur at the end of the tracks creates a shroud of mystery as the eye is led from the foreground to the horizon. You can use distance in at least two ways:
Vary the gap between the subject and the background.
Vary the distance between you and the subject.
Either way changes the effect of light and selective focus to enhance the way humans look at the world.
As noted landscape photographer, Christopher O’Donnell explains, “..it is the quality of the blur” that matters. “..an image with good Bokeh is one that has a lot of variation in shapes, color, and texture.”
For a photographer who’s still learning the ropes, experimenting with styles is a great way to find your niche. Bokeh is the perfect place to start your journey by trying out different styles and variations. Now that you’ve got the basics of Bokeh Photography in place, it's time to go out and start practicing. Get shooting now!
Looking for a new home to build your portfolio website? Try out Pixpa, absolutely free for 15 days today.
Frequently Asked Questions
What is the difference between blur and bokeh?
Blur and bokeh refer to different aspects of the out-of-focus areas in a photograph. Blur refers to the overall degree of sharpness or lack thereof in an image, while bokeh refers specifically to the aesthetic quality of the blur in the out-of-focus areas of an image.
Why is bokeh better on full frame?
Bokeh is usually considered to be more desirable on full-frame cameras because they have a larger sensor compared to crop-frame cameras, which allows them to create a shallower depth of field. This is because the sensor size directly affects the angle of view of the lens and the depth of field it can produce.
What is the sharpest aperture for portraits?
When it comes to sharpness, the sharpest aperture for a lens is typically around its middle aperture settings, around f/8 or f/11. However, this will also depend on the lens being used. In portrait photography, the sharpness isn't as much important as the bokeh effect and the isolation of the subject. That's why photographers tend to use low aperture numbers like f/1.8 or f/2.8, they will create a shallow depth of field and the bokeh effect that isolate the subject. It is important to keep in mind that the aperture is just one of the factors that influence the overall look of an image, and other settings such as shutter speed, ISO, and lens choice can also play a vital role.


